Using IncrediBuild in Microsoft Azure
- Dori Exterman
- Shmuel Kaplan (Unlicensed)
- Yoni Davidson
- Idan Eldar (Deactivated)
IncrediBuild enables you to scale infinitely to the cloud in a seamless manner. You and your development team may find yourselves in situations where you have urgent deadlines to meet and every second saved on build deployments counts. In these times of need, your best bet is to scale up the processing power by deploying cloud-based Virtual Machines. VMs running IncrediBuild Agents are easy to deploy and manage from Microsoft Azure.
Learn how "The Coalition", the creators of the popular game "Gears of Wars", transforms Azure VMs into a 700-core IncrediBuild "virtual supercomputer" and released two AAA games in one year.
How to scale up with Azure and IncrediBuild
Hybrid Cloud and Pure Cloud Solutions
IncrediBuild can be used in a hybrid-cloud environment or in a pure cloud environment. The Coordinator can be placed on both an on-premise machine or on a cloud-based Virtual Machine. Thus offering you the flexibility of setting up your IncrediBuild infrastructure as you please.
Azure Marketplace IncrediBuild Virtual Machine Image
IncrediBuild provides its Enterprise Edition customers with an already made IncrediBuild Virtual Machine image directly in the Azure Marketplace. This is the simplest and most straightforward way of having an IncrediBuild VM instance up and running.
The steps are identical to the steps used for the custom Virtual Machine creation, except we save you the grunt work of manually installing and setting up IncrediBuild on the Virtual Machine.
Custom Virtual Machine Creation
Once you are signed in to the Azure Portal, open up the marketplace and go to the Compute page, or just type in IncrediBuild in the search
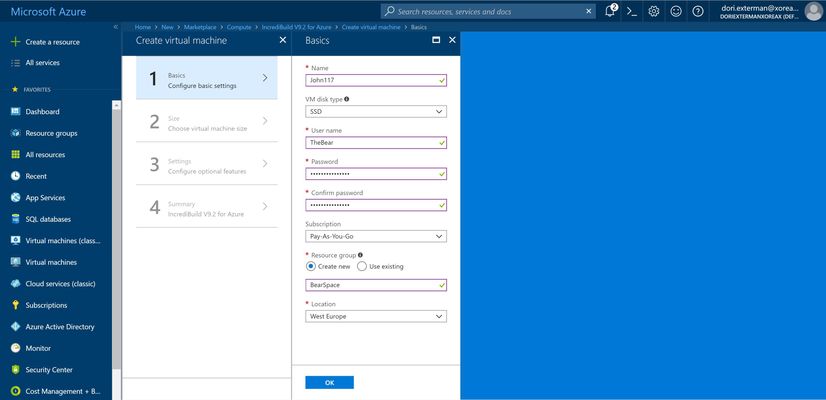
- Go to the Azure portal and create a Virtual Machine that suits your needs
- Fill in the text boxes with the required information and complete the setup process.
- It is highly recommended that all Virtual Machines that you intend on adding to your network be part of the same resource group and are connected on the same Virtual Network. This makes it easier for when you want to add or remove VMs, and saves you time on network configurations.
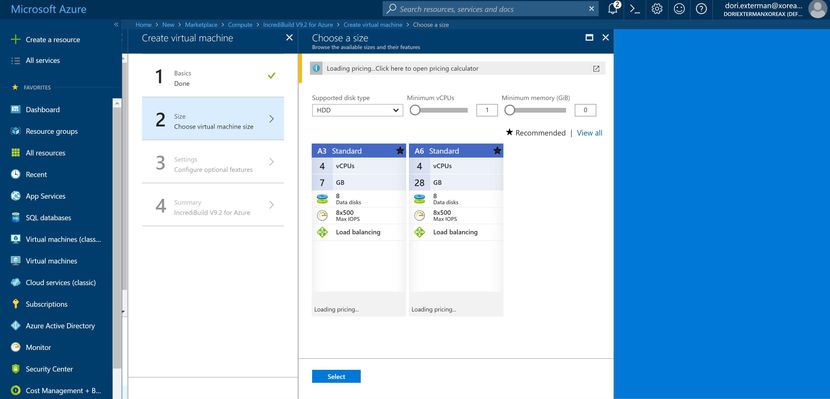
- Choose the VM size according to your needs then proceed to the next page.
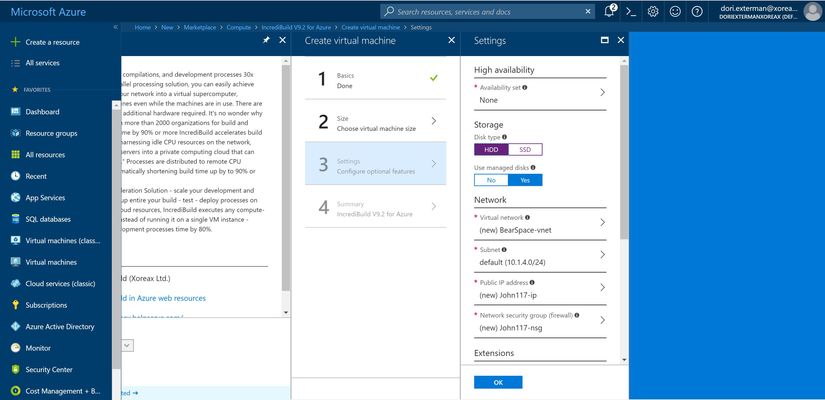
- On this page, you can configure your settings. If this is your first VM, a Virtual Network will automatically be created for you. Make sure that every VM that you want to use with IncrediBuild is connected to the same virtual network.
To connect your Virtual Network to your on-premise network follow the steps in this link.
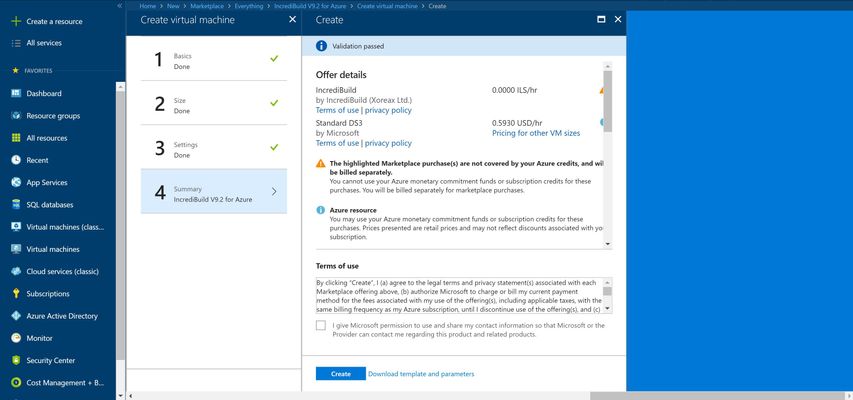
- Agree to the terms of use and click create.
- Wait for Azure to create your VM.
Use Remote Desktop Connection to access the VM so you can finish configuring IncrediBuild.
You need to load a valid IncrediBuild license onto the Coordinator on whichever VM you decide will host the Coordinator. You also need to make sure to choose the necessary Coordinator during the IncrediBuild setup process when provisioning Agents.
IncrediBuild VMs on Azure already have IncredBuild on them, so you just need to specify a Coordinator machine and load a valid license.
For a step by step explanation on how to manually setup and install IncrediBuild, Click here for a detailed explanation.
Setting up an IncrediBuild Agent on your VM
Setting Agents up on a VM is done the same way you would setup Agents on your local network.
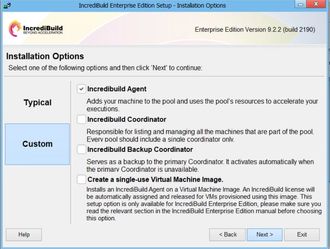
You have two key installation options:
- IncrediBuild Agent option:
- With this choice, you will need to manually unsubscribe your license before destroying the VM instance.
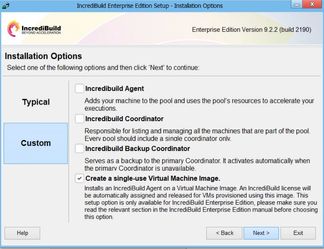
- Create a single-use Virtual Machine Image option:
- With IncrediBuild Enterprise Edition, we introduced this new installation option.
- Once a single-use VM image is created, it is automatically subscribed to a license from the Coordinator.
- Once the VM is destroyed, the license is automatically unsubscribed and returned to the Coordinator.
- With this feature, you can essentially set up one Virtual Machine with the single-use Virtual Machine image, copy the VM instance, and provision and de-provision VMs on the fly without needing to worry about license management.
- Open the IncrediBuild Setup file from the VM you would like to install an Agent on.
- From "Custom" you can either check the "IncrediBuild Agent" option or the "create a single-use Virtual Machine image" option.
The "Create a single-use Virtual Machine Image" option works only for IncrediBuild Enterprise Edition customers.
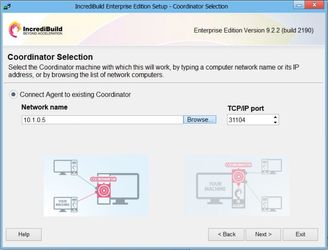
- Click Next and connect the Agent to an existing coordinator.
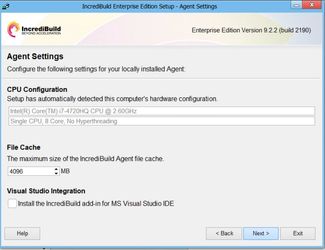
- Click Next and make sure of the Agent Settings.
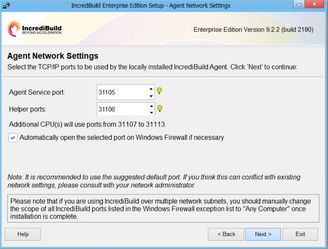
- Configure the Agent Network Settings. It is recommended to use the default ports unless there is a conflict on your network.
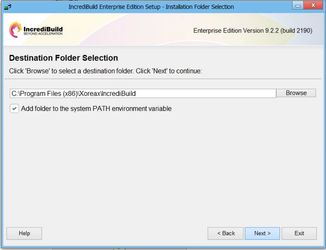
- Select the destination folder and click next to finish the setup process.
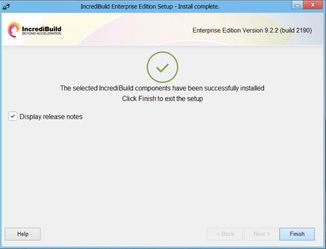
- You have successfully setup and deployed an IncrediBuild Agent on an Azure VM.
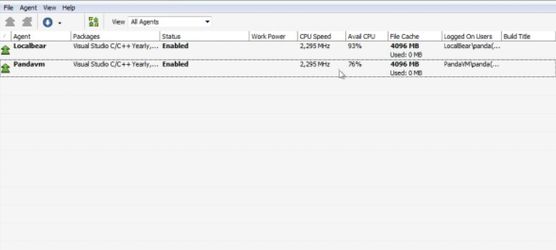
- Open the Coordinator Monitor to confirm that the connection has been made and that the Agent is subscribed with a license.
Use the command line to ping your VM's from different machines to make sure they can communicate. You can do it by typing "ping *IP Address of VM you want to ping*"
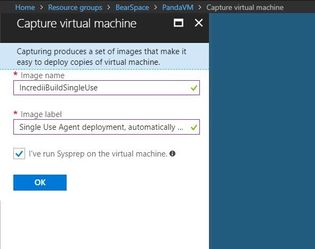
Capturing a single-use Virtual Machine instance Image
Instead of manually configuring your VMs and Agents all over again, simply capture the VM instance, so you can deploy the same image whenever you need to scale up. Since single-use Virtual Machines are automatically subscribed and unsubscribed licenses whenever they are created or destroyed, you won't need to worry about manually doing it yourself for every Virtual Machine you have provisioned.
IncrediBuild and Azure work extremely well together. You can scale up and add as many cores as needed by you or your development team.
How to Add the IncrediBuild GUID to Azure Template
By September 30th 2018, Microsoft requires that customers who are using IncrediBuild inside Azure will add the IncrediBuild Azure GUID to the Azure template which is used for provisioning Azure Virtual Machines.
This GUID (a unique identifier) is required in order to allow Microsoft detect that IncrediBuild is being used as part of the provisioned Azure virtual machines and contact IncrediBuild if required.
Adding the IncrediBuild Azure GUID is a simple process that only requires adding an element to your Azure provisioning template:
- Open the Template you are using for provisioning your Azure Virtual Machines
In your deployment JSON file under Resources, add the Incredibuild GUID (pid-01d850ea-c9c4-40bf-afcd-0573184bc64f) as in the code snippet below:
"resources": [
	{
		"apiVersion": "2017-05-10",
		"name": "pid-01d850ea-c9c4-40bf-afcd-0573184bc64f",
		"type": "Microsoft.Resources/deployments",
		"properties": {
			"mode": "Incremental",
			"template": {
				"$schema": "https://schema.management.azure.com/schemas/2015-01-01/deploymentTemplate.json#",
				"contentVersion": "1.0.0.0",
				"resources": []
			}
		}
	},
Save and Run your deployment script as usual.
For further information on how to use Azure templates to provision resources in Azure along with some basic Azure sample templates, follow these Microsoft links:
- A full list of Azure ready templates: https://github.com/Azure/azure-quickstart-templates
- A sample for provisioning Azure Linux Virtual Machines: https://github.com/Azure/azure-quickstart-templates/tree/master/101-vm-simple-linux
- A sample for provisioning Azure Windows Virtual Machines: https://github.com/Azure/azure-quickstart-templates/tree/master/101-vm-simple-windows
If you have any questions or require assistance, please contact us at support@incredibuild.com