
This section describes how to customize IncrediBuild integration with Visual Studio IDE.
Note: For handling IncrediBuild Extension/Add-in issues in Visual Studio, see also the information in the Visual Studio Add-in section of the Agent Settings dialog box.
Displaying IncrediBuild Menu in the Menu Bar of Visual Studio IDE
In most Visual Studio versions, after you install IncrediBuild Extension, IncrediBuild menu is added to the menu bar of Visual Studio IDE. However, in Visual Studio 2019, IncrediBuild menu appears as a sub-menu under the Extensions menu, and there may be other cases where IncrediBuild menu was removed from the menu bar. In such cases, you can change the location of IncrediBuild main menu, and display it in Visual Studio menu bar.
> To display IncrediBuild Menu in the menu bar of Visual Studio IDE:
- On Visual Studio IDE, open the Tools menu > Customize option.
- On the Customize dialog box – Extensions Menu tab, select the IncrediBuild check box to display IncrediBuild menu in the IDE menu bar:
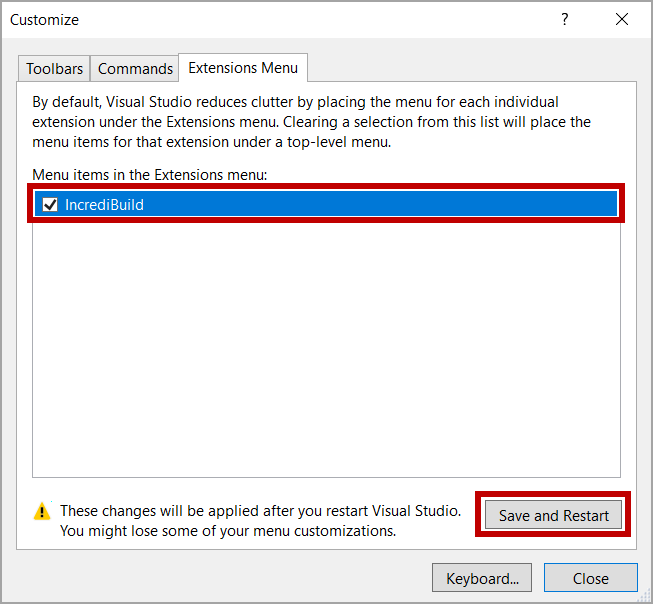
- Click the Save and Restart button to apply your new setting.
After Visual Studio is restarted, IncrediBuild menu appears in the menu bar: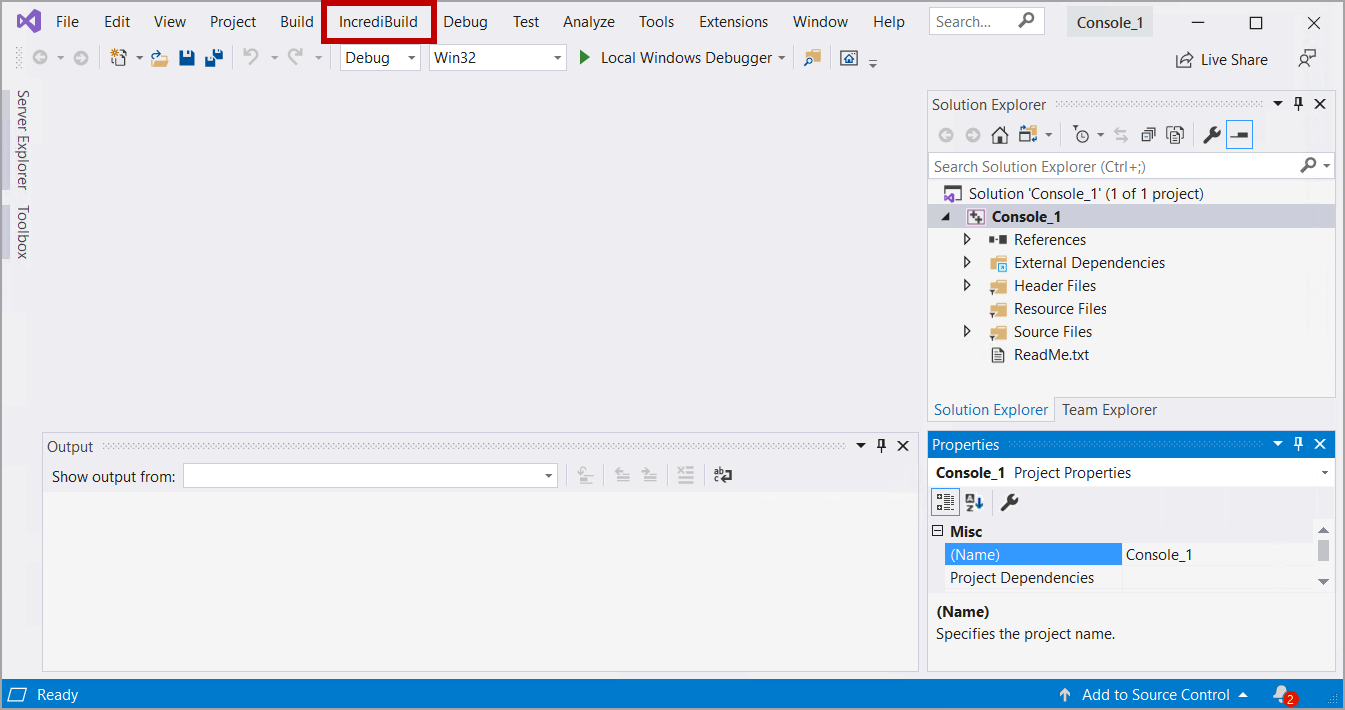
Adding IncrediBuild Toolbar to Visual Studio IDE
IncrediBuild provides you with a toolbar, which you can add to Visual Studio IDE. You can customize this toolbar, and add to it all the commands that appear in IncrediBuild main menu.
> To add IncrediBuild toolbar to Visual Studio IDE and customizing it:
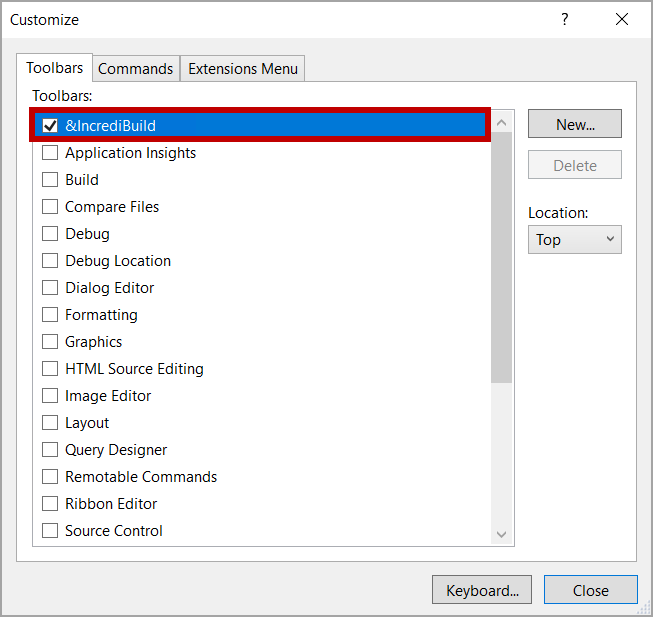
- On Visual Studio IDE, open the Tools menu > Customize.
- On the Customize dialog box – Toolbars tab, select the IncrediBuild check box to add IncrediBuild toolbar to the IDE:
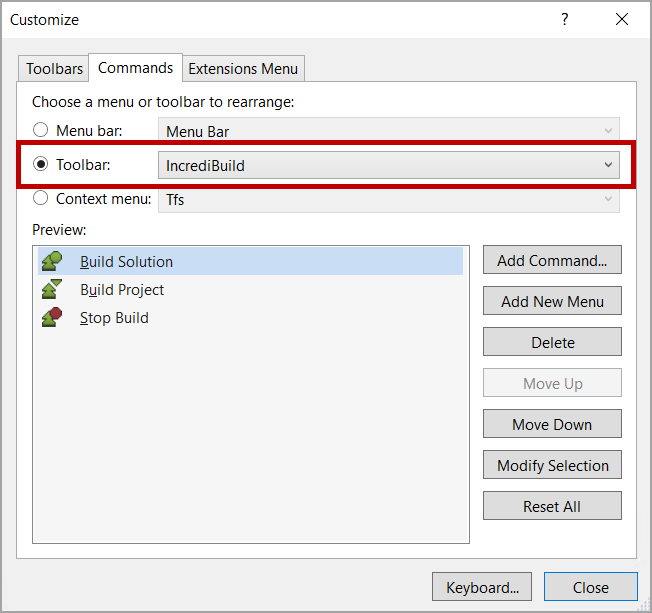
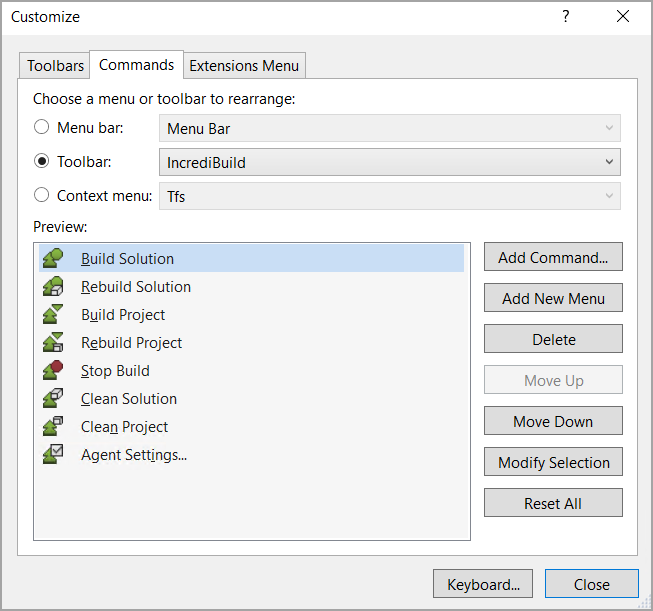
- To customize IncrediBuild toolbar, move to the Commands tab.
- On the Commands tab, select the Toolbar radio button, and select IncrediBuild from the drop-down list:
- To add commands to IncrediBuild toolbar, click the Add Command… button.
- On the Add Command dialog box, select IncrediBuild from the Categories list. Then, select the command you want to add to the toolbar, and click OK:
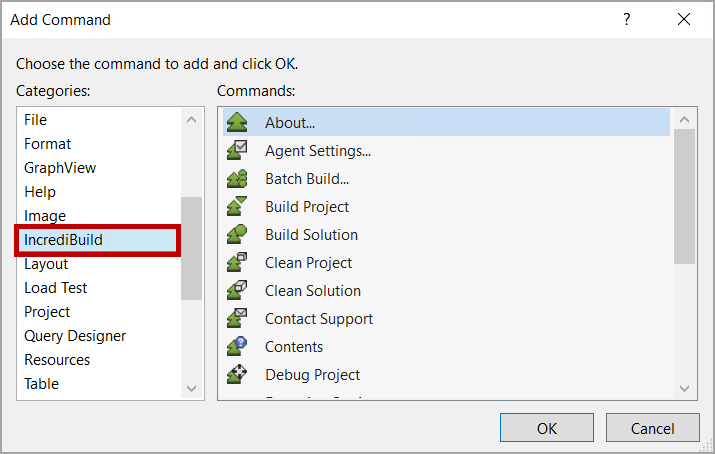
You return to the Commands tab. - Repeat the above procedure for each command you want to add to the toolbar.
- Once you added and organized the new commands in IncrediBuild toolbar, click the Close button on the Commands tab to add the toolbar to the IDE:
IncrediBuild toolbar now appears in Visual Studio IDE with your selected commands: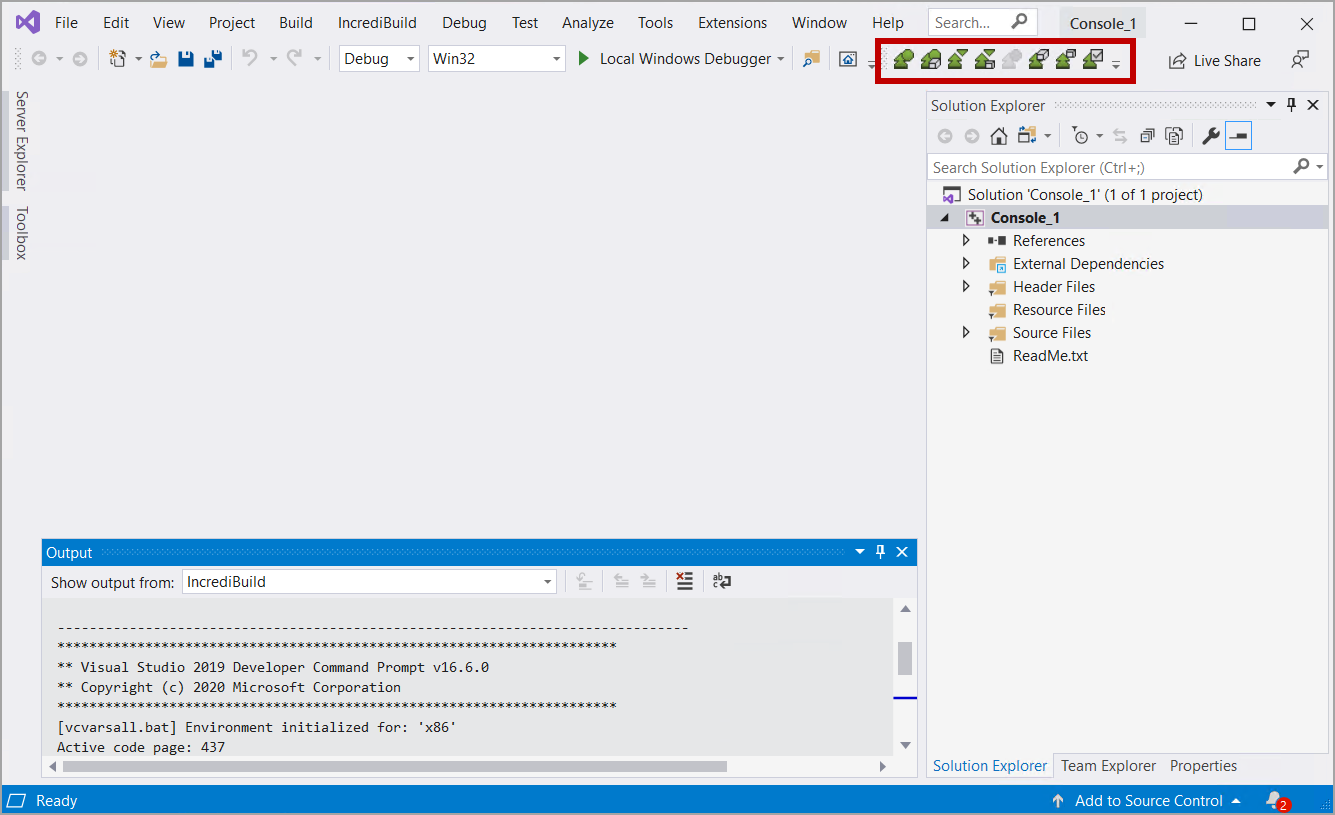
Adding Keyboard Shortcuts to IncrediBuild Commands
> To add keyboard shortcuts to IncrediBuild commands:
- From the Tools menu, select Options.
- Select Environment > Keyboard.
- In the Show commands containing: box, enter:
- For VC7 - buildAddInVC7.
- For VS 2005/2008/2010/2012/2013/2015/2017/2019 - IncrediBuild.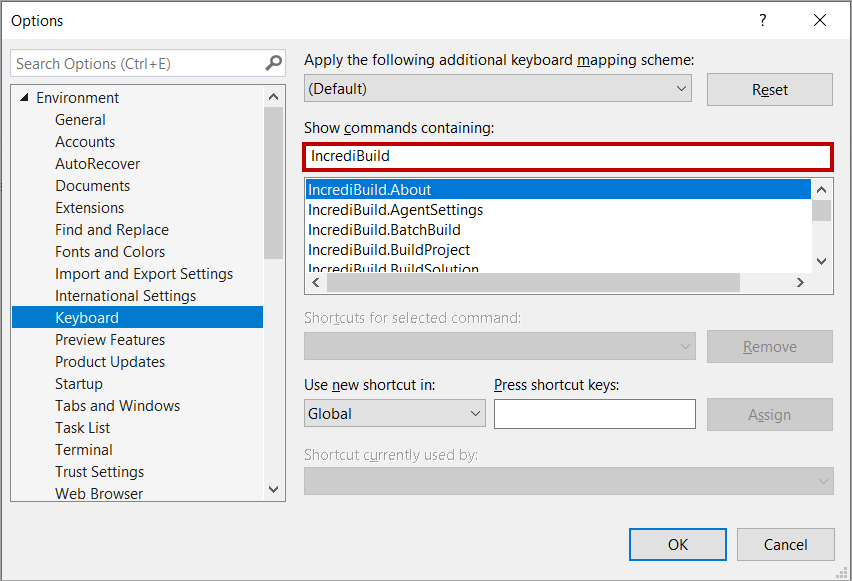
The list of available IncrediBuild commands is displayed. - From IncrediBuild command list, choose the relevant command, enter the required keyboard shortcut in the Press shortcut keys box, and then click Assign.
Note: MSVC's standard keyboard shortcuts may be overridden this way (for example, by setting F7 to start an IncrediBuild build, or CTRL-F7 to compile the currently edited file).
Visual Studio Reference:
Batch Build Configurations
Accelerating Custom Build Steps, Build Events, and Build Tools
C# Acceleration
Using IncrediBuild for Visual Studio 2010 and Later
Further VS Build Performance Optimizations
Visual Studio 2008 and Earlier
IncrediBuild Solutions:
Visual Studio Solution
Make and Other Build Tools Solution
DevTools Solution
IncrediBuild for Qt Creator
IncrediBuild For Game Development
IncrediBuild for Unit Tests
Working with Build Groups
Running Gitlab Builds with Incredibuild
User Manual:
List of Open Sources
Getting Started
Set Up and Installation
IncrediBuild Solutions
The Coordinator
IncrediBuild Agents
IncrediBuild Cloud
Working from Home
Troubleshooting Issues
IncrediBuild Additional Resources
Release Notes