Using Build GroupsA Build Group unites IncrediBuild enable you to use Build Groups, in order to unite several Agents into a separate distribution group, where builds can be executed and distributed only across the Agents that participate in this group. Helper Agents that belong to a certain Build Group will be available only to the Initiator Agent of their Group. By using Build Groups, different groups of users can use IncrediBuild separately, with a single Coordinator serving all groups. Each user group can function independently of the others, distributing builds only to Agents that belong to the same Group as their Initiating Agent. Defining a New Build Group and Associating Agents with Existing GroupsWhen you associate one or more Agents with a Build Group, you can create a new Build Group or add the Agents to an existing Group that is already defined in your system.
> To define a new Build Group or associate Agent(s) with an existing Build Group: In the Coordinator Monitor, select one or several Agents that you want to unite as a group.
Open the Agent menu or right-click the Agents, and select the Build Group... option:
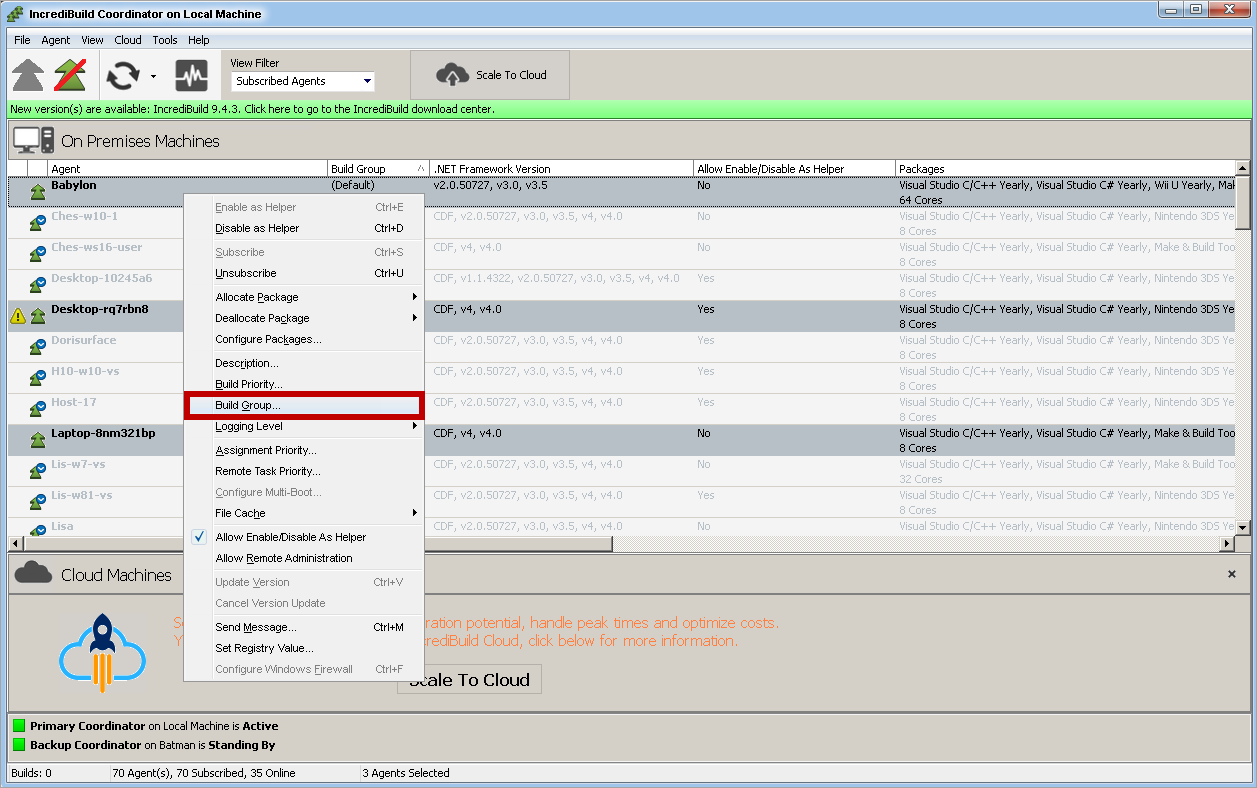 Image Removed Image Removed
The Build Group dialog box appears.
In the Build Group dialog box, enter a name for the new Build Group, or select an existing Group from the drop-down list. Then, click OK:
 Image Removed Image Removed
Note: If you are creating a new Build Group, a confirmation message appears, asking you to confirm the creation of the new Build Group. The selected Agents now belong to the specified Build Group, and they will participate only in builds that are initiated by the Initiator Agent of the Group: 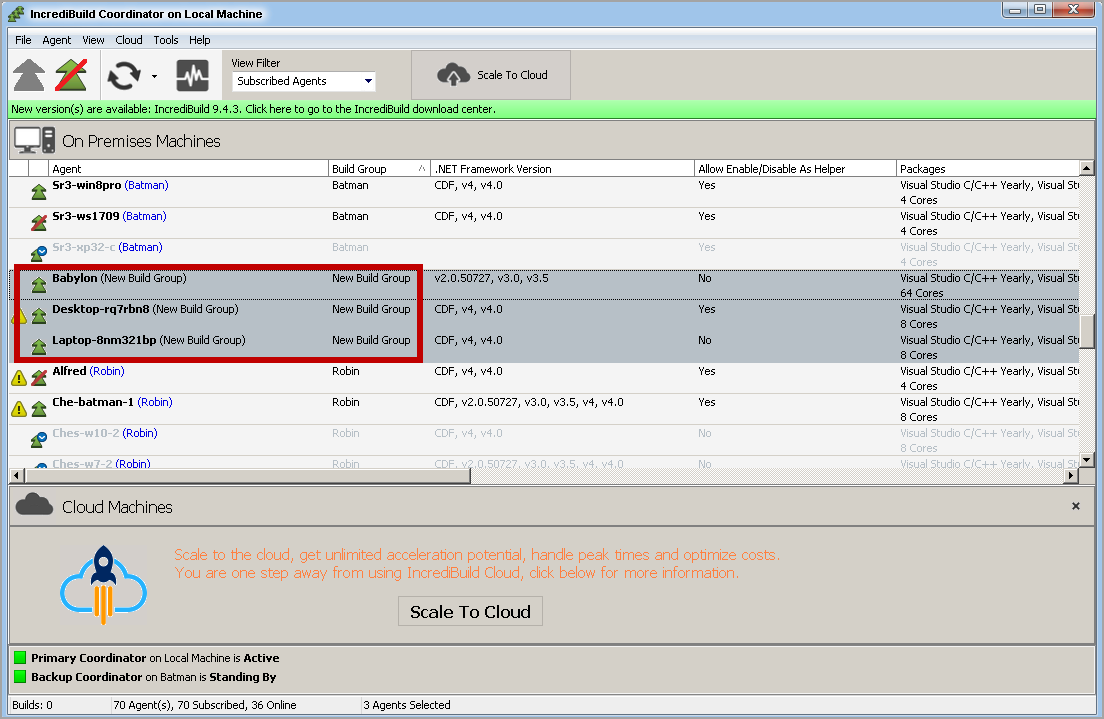 Image Removed Image Removed
Note: You can define an unlimited number of Build Groups.Removing an Agent from a Build GroupAfter you associated an Agent with a certain Build Group, you can associate it with a different Build Group or remove it from any Build Group entirely. > To remove an Agent from a Build Group: In the Coordinator Monitor, select the Agent you want to remove from its Build Group.
Open the Agent menu or right-click the Agent, and select the Build Group... option.
In the Build Group dialog box, open the drop-down list and select the Default option. Then, click OK:
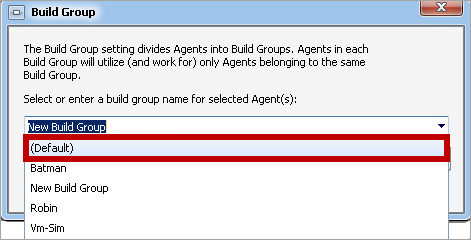 Image Removed Image Removed
Note: You can also associate the Agent with another Build Group. The selected Agent is removed from its previous Build Group, and it is now available for all Initiator Agents that do not belong to a certain Build Group:
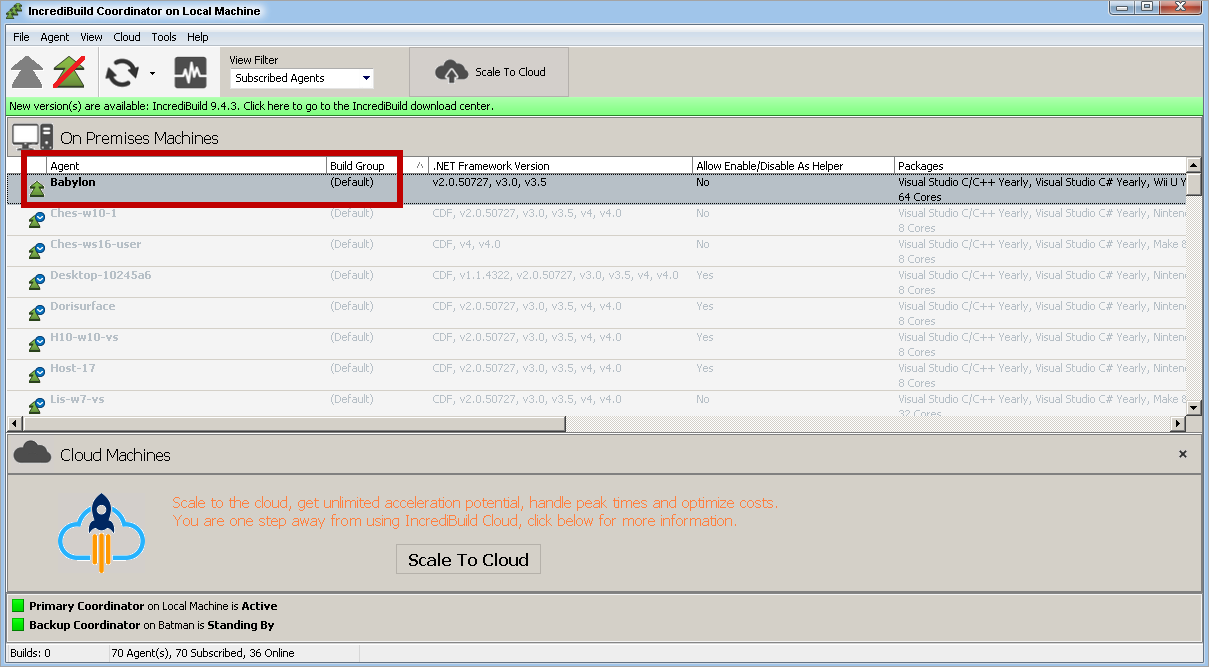 Image Removed Image Removed | Child pages (Children Display) |
|---|
|